Left Continue shopping
Your Order

You have no items in your cart

Aphids!

Aphids!

Uh oh! I've got aphids! [/caption] Aphids feed on most fruit and vegetable plants, they reproduce like there's no tomorrow. Both adults and nymphs suck plant sap, which usually causes distorted leaves, buds, branch tips, and flowers. Severely infested leaves and flowers may drop. As they feed, aphids excrete a sweet, sticky honeydew onto the leaves below. Also, some aphids spread viruses as they feed.  Aphids are bad news, and if you find just one in your garden, you should act right away. Look under the leaves to find them.

Im using organic insecticidal soap (orange bottle). I have the blue bottle incase of extreme infestations that can lead me to pull out the plants like I did with my zucchinis. Organic damage control

  • Drench plants with strong sprays of water from a garden hose to kill aphids. (A hard rainstorm will have the same effect.)
  • Keep your plants as healthy as possible.
  • Control ants that guard aphid colonies.
  • Spray aphids with insecticidal soap.Both bottles can be found in True Value
Read more
Container Garden

Container Garden

You can grow anything in containers, its the soil quality that will determine the strength of the plants. I found that the plants in my small containers are doing better than those in my big boxes, this is because I put my own homemade compost in them. Here is a closer look  You can mix and match your favorite leafy greens and herbs, you can forget about the spacing rules like I have here, because we have a short winter, I won't wait for the plants to reach their full size to harvest, instead I will harvest individual leaves. This has been working really well. The plants don't mind being crammed in a small space.This vigorously growing tomato plant was grown from cutting, meaning I inserted a pruned stem from another plant into the container, and watered it until it developed its own root system. Its growing exceptionally well, I didn't even get to stake it yet, and its sprawling on the wall and on the ground. Seeing my container plants' progress and success in my homemade compost encourages me to make as much as I can for my future plantings. My soil components are again 1/3 homemade compost + 1/3 peat moss + 1/3 perlite You can place the containers anywhere that's in full sun, and enjoy the fresh vegetables all season!
Read more
Diatomaceous Earth

Diatomaceous Earth

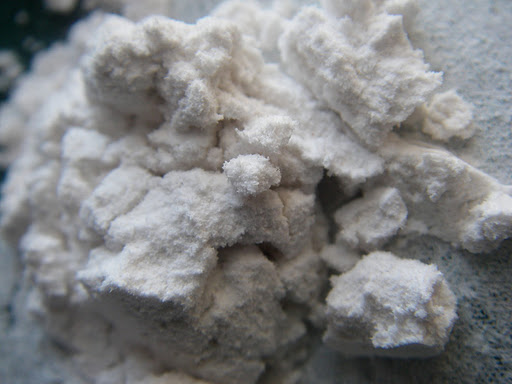
Diatomaceous Earth is a natural, organic garden pest control, it is a powder made of 100-percent organic ground fossils of diatoms that came from fresh water Diatomaceous Earth kills by physical action- not chemical. While it seems like a harmless powder to us, it is actually quite sharp and hazardous to insects. It must come in contact with the pest to be effective. It will scratch and puncture the exoskeleton of soft-bodied insects, thereby causing them to dehydrate and die.[/caption] I dust it on the plants to reduce numbers of whiteflies and aphids, I first spray the plant with organic insecticidal soap, then I dust the powder on the wet plant and it sticks for days.I didn't really know I had an aphid problem until I noticed the drying and yellowing of my out of season watermelon plant that was doing pretty well until its infestation, and one of the corn plants. I neglected the yellowing for a while until I took a closer look to find tiny clusters of aphids on the underside of leaves. I discarded the heavily infested sections of the plant and I did the soap and powder method on the okay ones.  I got my powder from Amazon.com , there are many brands, you only have to make sure its food grade diatomaceous earth which is completely safe and organic. You will see a lot of this powder on my plants, now you know what it is!
Read more
5 damaging flies

5 damaging flies

As the gardening season starts a lot of us, including myself  overwater in order to cool the soil and correct heat damage. This is a big mistake because it invites certain pests to your garden that cause some problems. Having pests in an outdoor garden is inevitable, and organic control measures can be difficult and frustrating, so know your pest well before going into any control measures so as not to waste time and energy. Houseflies & Fungus gnats The pests I'm having thanks to overwatering are fungus gnats and houseflies, both lay eggs in the soil, they're not a major problem since their larvae feed on organic matter and not the plants or their roots. They are however a big nuisance when working in the garden. This control method only gets rid of the adults, the sticky tape can be found in ACE Hardware,  to get the larvae, you can place pieces of raw potato on the soil surface and check it after around 5 hours, you should find the larvae of these flies eating the potato away, discard the potato piece and keep doing it and numbers should decrease. Fruitflies  A major problem I've been having is that fruit flies have been laying eggs in my butternut squash, I've lost six fruit already, one day the fruit is nice and healthy, and the next I find a mushy dimple, and when I crack it open, I find larvae (white worms) feeding away inside. It's very hard to hand pollinate the flower then cover, I need to figure out a new organic way to protect my fruit, since the plant is growing too fast and over my very tall trellis.Im worried this might happen to my zucchini fruits once they start forming, if I cover the plants, bees won't have access to pollinate the flowers. Whiteflies   These are the worst pests in the garden, they like a lot of plants including tomatoes and squash plants, if they're found on the underside of leaves, you must control them immediately as they cause serious damage. Whiteflies and they're nymphs (the young whiteflies) suck on the sap of the leaves, causing the spread of viruses, yellowing leaves, and stunted growth, they spread very fast so one must control them quickly. The yellow sticky tape works for adults, so does insecticidal soap, and horticultural oil.  I am also following a control method which is to place reflective mulch, in my case aluminum foil under the possible host plants. The foil disorients the flies and annoys/repels them. Leaf Miners   I think most gardens in Kuwait have this problem around this time, leaf miners are a certain kind of fly that lays eggs inside the leaves, later having the larvae grow and feed inside the leaf creating squiggly lines in their trail. Its not a major problem if its a big strong plant, the correct control measure is to pick and discard the affected leaves, but I'm not about to sacrifice almost a foot-wide leaf for a few blemishes, I found a simpler way which is to squish the visible worm with the my fingers, it will die inside the leaf and will not make it as an adult, in return I will keep the leaf and it will recover quickly.
Read more
New Compost Batch

New Compost Batch

Here is a new compost batch that I started last month, its getting well watered and turned. I add layers of grass clippings (C+N), then kitchen scraps(N), then wood shavings (C), this way the dry wood shavings mask the scent of the fruits and vegetables which will attract less insects. The reason my grass clippings are N+C is because I leave them in the sun for about 2 weeks before I put them in the bin, this way the dried brown grass reacts with the still fresh grass to make fast compost. [/caption] You can see that the wood shavings take longer to compost than the grass and kitchen scraps. Im also making new compost tea to water and spray the plants with.
Read more
Steeped Compost Tea

Steeped Compost Tea

Compost in any form is a plant's idea of gourmet health food. Made into tea, it's the ideal liquid fertilizer, especially for young plants. Compost tea helps plants grow stronger and more productive and, evidence suggests, can protect against disease. The tea can be sprayed on the plants or used instead of water for a soil drench. I'm making compost tea the inexpensive and simple way, make sure you're using non-chlorinated water.

1- Empty about a cup and a half of mature compost into an old sock. 2- tie the sock. 3- toss it in a bucket of water, here I am recycling an Rawdatain plastic water gallon. 4- stir the mixture 5- keep stirring it as often as you can for a couple of days, stirring allows oxygen to enter the mixture in order for aerobic bacteria to do their job. Update:  Here is the compost tea two days later:

It smells a little sweet and earthy, no bad smell at all!

Read more
Hardening Off

Hardening Off

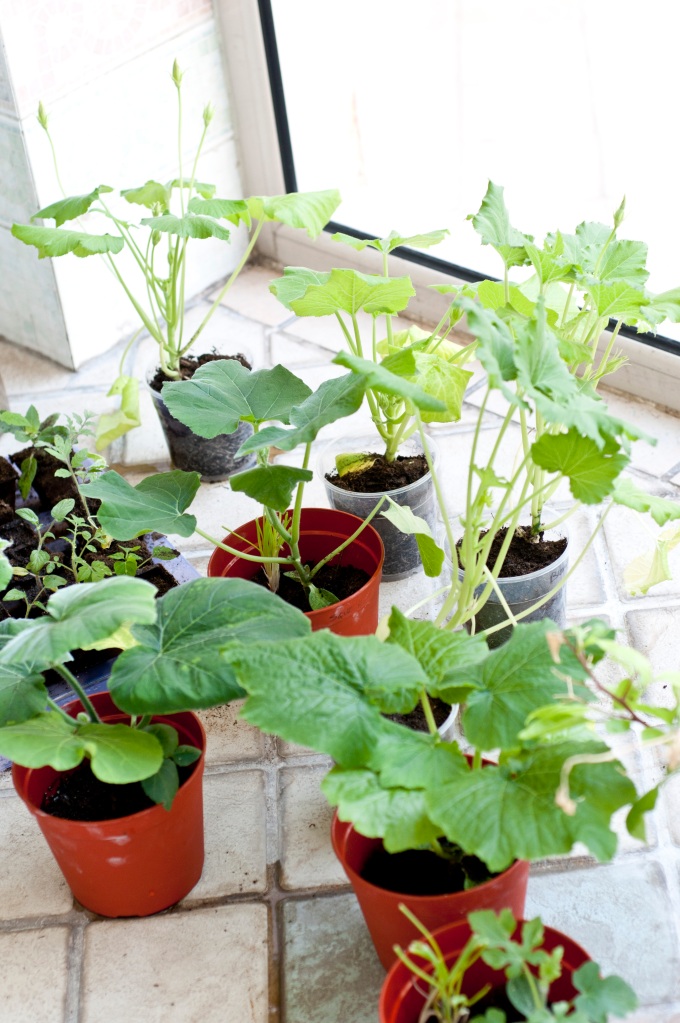
I've put the time and effort into growing my own healthy vegetable transplants indoors under lights and now it’s time to transplant them into the garden. But before I head for the garden I must be sure to harden off those tender seedlings or I'll be making a mistake that could destroy all my careful efforts. I left the country for about two weeks, and since then, my seedlings got yellow and sad, but they're still alive! and I'm sure they can make it with the proper care! [/caption] Even after the temperatures drop, conditions outside in the garden are still much harsher than your home grown vegetable seedlings are accustomed to. If you were to take those sensitive plants and move them directly into the garden there’s a good chance that they would not survive the transition. What the vegetable plants need is a hardening off period where they can slowly adapt to the more intense light, winds, temperature variations, and other conditions that they will encounter in the outdoor world. Hardening off requires time but the process itself is a simple one. Begin by carefully transporting your seedlings to a somewhat sheltered location where they can get their first taste of what life outdoors is going to be like. This initial exposure should be brief, only an hour or two during the early morning or late evening hours. Start the hardening off process a couple of weeks before you anticipate planting the seedlings out into the garden. Each day you will be moving the plants outside for increasing lengths of time, allowing them to gradually get used to the sunshine, wind, rain, and other outdoor conditions. In my case I've moved them to a warm area with direct sun through glass windows. The area is not as hot as it is outside, so I can leave them all day. The Terra-cotta pots are from TrueValue.
root-bound zucchini plants
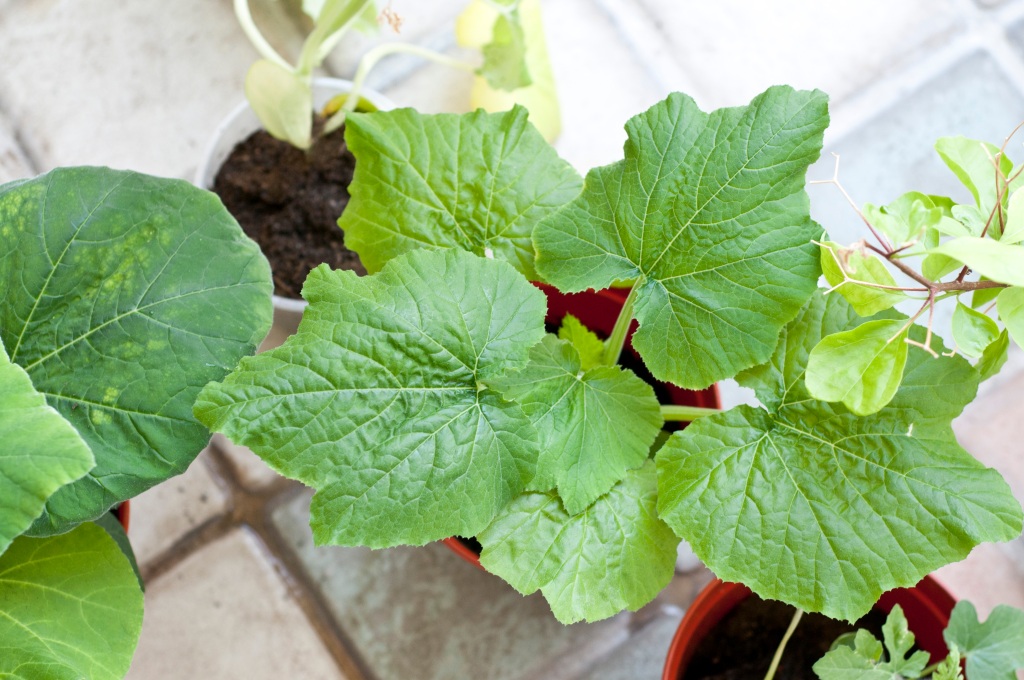
Being Root-Bound: "When a plant grows for too long in its container, it generally becomes root-bound. With no room for additional growth, roots become tangled, matted, and grow in circles.  Root-bound plants placed in the ground without having their roots untangled often fail to overcome their choked condition. This results in stunting the plants growth and potential." My plants are definitely root-bound and need to be transplanted as soon as possible. The plants look yellow and weak because of malnutrition, they're hungry! this is why I've just added a layer of compost to the very small pots to give them a quick fix. They will bounce back, but the tiny pots are not enough, they will soon be transplanted into their permanent location; the square foot raised beds Don't skip this crucial step when transferring your seedlings to their containers or in the ground.
Read more
Sifting Compost

Sifting Compost

My garden beds are almost ready to be planted out, this is why its time to collect finished compost. Not all my compost is finished, the reason behind that, is that I was adding new materials over finished compost. This is why I'm using a sifter to screen out the unfinished parts. The sifter can be found in Co ops for under two dinars.  Sifting compost is a lot of work, but the end result is worth it. I got this fine, crumbly, clean, and attractive looking compost.  This compost took under 3 months to transform from grass clippings, orange peels, cardboard, melon rinds, and more, to this rich dark magic fertilizer and mulch. Sifting compost is done by pushing the compost through the holes or by shaking the sifter repeatedly. Make sure the container under the sifter is larger in size; to collect everything, because your compost is very valuable . I used a plastic basin. Collect and toss the unfinished compost (left in the sifter) in your compost bins for another round of composting. Can you believe this entire process took under three months!
Read more
You don't have space

You don't have space

A lot of people really like the idea of gardening, but don't imagine themselves doing it since they don't have space.  You don't need to be planting things in the ground, container gardening is perfectly fine! and maybe even better, since you completely control the soil. Containers come in all shapes and sizes and they will fit your lifestyle and space. If you live in an apartment, you may have a balcony that is perfect for container gardening, or a wide enough window sill outside your window to fit a container with all your favorite cooking herbs!  space really isn't an issue. Anything will grow in compost rich soil in full sun, you just need to fit its roots in their correct size container! Tomatoes need a minimum size 5 gallon container, and herbs will fit really anywhere thats about 8 inches wide and deep.  The Square Foot Gardening method I'm adopting for my garden is essentially a container method. So find a good spot around your house that receives about 8 hours of sunshine and you'll have a nice kitchen container garden to last you from September to May.

Here's a photo update on my seedlings: Here's something I found interesting, This is a French Marigold seedling escaping its very peculiar seed:

Read more
Almost there!

Almost there!

Here is an update on my compost, the compost is not completely finished but it is almost there.  Compost is finished when the original items in the compost are no longer recognizable. I can certainly say that about mine, since I can no longer see the newspapers, orange and lemon peels or watermelon rinds, but there is still more time to wait, since some paper items are still visible because carbon rich items take longer to decompose than nitrogen rich ones. The bins don't smell at all and only need water every couple of days since it's so hot. Dark brown It keeps shrinking and shrinking, and in the end will be dark, crumbly, and ready to feed your plants. This compost is only a month old and already on the way to becoming done! So what are you waiting for? go start your own bins now and recycle your way to a healthy garden!
Read more
Square Foot Gardening

Square Foot Gardening

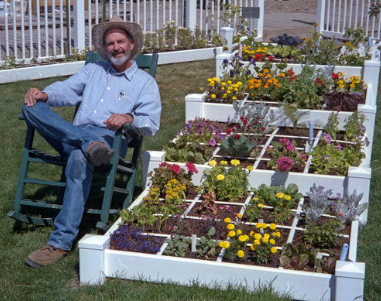
What is square foot gardening? A simple, unique and versatile system that adapts to all levels of experience, physical ability, and geographical location. Grow all you want and need in only 20% of the space of a conventional row garden. Save time, water, work and money! I am following the square foot gardening method, and I'll be using it as a reference through out the blog. Square foot gardening invented by the genius Mel Bartholomew! Learn more about it in his website , Or order his very very valuable book. It may come in downloadable PDF files too, if you search.

Here are the 10 things that make SFG different from traditional row gardening:

  1. Layout. Arrange your garden in squares, not rows. Lay it out in 4′x4′ planting areas. Companion plants can help each other grow bigger and tastier!
  2. Boxes. Build boxes to hold a new soil mix above ground. Your existing soil doesn't matter! forget about it, and just worry about the new soil called Mel's Mix.
  3. Aisles. Space boxes 3′ apart to form walking aisles. It makes it easier to walk and sit around the boxes, especially when your plants get really big and spill out of the boxes a little.
  4. Soil. Fill boxes with Mel’s special soil mix: 1/3 blended compost (please please make your own! The compost sold in Kuwait is a little shady) , 1/3 peat moss, and 1/3 coarse vermiculite (All available in True Value).
  5. Grid. Make a permanent square foot grid for the top of each box. A MUST!
  6. Care. NEVER WALK ON YOUR GROWING SOIL. This is how the soil stays so fluffy and airy for the roots stay happy. Tend your garden from the aisles.
  7. Select. Plant a different flower, vegetable, or herb crop in each square foot, using 1, 4, 9, or 16 plants per square foot. You might, for example, plant a single tomato in a square, but you’d plant 16 carrots in another. Using this system, you can cram a lot of garden into a small space and still get excellent yields.
  8. Plant. Conserve seeds. Plant only a pinch (2 or 3 seeds) per hole. Place transplants in a slight saucer-shaped depression. This means you wont waste seeds! The traditional way is to plant lots of seeds then cut off the majority and leave the strongest.
  9. Water. Water by hand from a bucket of sun-warmed water.
  10. Harvest. When you finish harvesting a square foot, add only compost and replant it with a new and different crop.
Here's how Im starting my square foot garden : I decided how big of an area I want to use, I am placing my SFG on the roof of my house, which I made sure received at least 8 hours of full sun. I am going big and starting with lots of boxes. So after thorough planning I decided I want two 4x4 square foot boxes (which is the standard) two smaller boxes for root vegetables like carrots and potatoes, and one long box for herbs. You can download the guide I created for the carpenters here . Its not the most accurate illustration of what the boxes look like in the end, but the numbers are right. You can change the measurements how ever you like, most importantly, you have to make sure each square is 1ft squared in size= 30 cm. Also Most vegetables require 6 inches of soil, I've decided to use around 20cm. If the boxes are placed over a garden/soil, they don't need bottoms. In my case, I have to apply bottoms since they're going to be in the roof. The bottoms are waterproof 2cm thick plywood. The plywood has to have around 0.6 cm holes drilled in each square, plus in the corners. My boxes have weird squares in the plywood because the carpenter mistook 0.6cm for huge 6cm holes, I had them fix them without problems. Potato/Carrot beds: One of the 4x4' beds with the herb bed: You can of course build your own boxes, and a very detailed guide is in the book. Im sure its much more fun.I don't have the skill or time, so I had the boxes done for 50KD total, 30 for the wood and 20 for the building. The work was done by Ibrahim in Classic Design Carpentry : Don't forget, you can collect sawdust for free and use it as a carbon source in your compost! Maybe I'll paint the outsides of the boxes with the kids before the season starts, what do you think?
Read more